When temperatures plummeted in Chicago last winter, many homeowners found their heating systems failing when they needed them most. You don’t want to be caught off guard like that, do you? Preparing your system now can save you from costly repairs and discomfort later. Whether you recently did a heating installation or have an older system, start by inspecting your components, but don’t stop there. Minor issues like dirty air filters or unsealed windows can impact your system’s efficiency. Stay ahead of the cold and guarantee your home remains a cozy winter refuge. Here’s how you can get started.
Inspect Your Heating System
Begin by thoroughly inspecting your heating system to identify any signs of wear or potential issues.
First, visually examine all accessible components, including ducts, vents, and heating units. Look for any visible cracks, rust, or corrosion, especially around joints and seams. Verify that all connections are secure and no loose parts could cause malfunction. Listen for unusual noises like rattling or hissing, which might indicate underlying mechanical problems.
Next, test the thermostat to verify it’s functioning correctly. Set the temperature a few degrees higher than the current room temperature and listen for the system to activate. If it doesn’t respond promptly, there might be an issue with the thermostat or its connection to the system.
If applicable, confirm that the pilot light is burning a steady blue flame. A yellow or flickering flame can indicate a problem that requires professional attention.
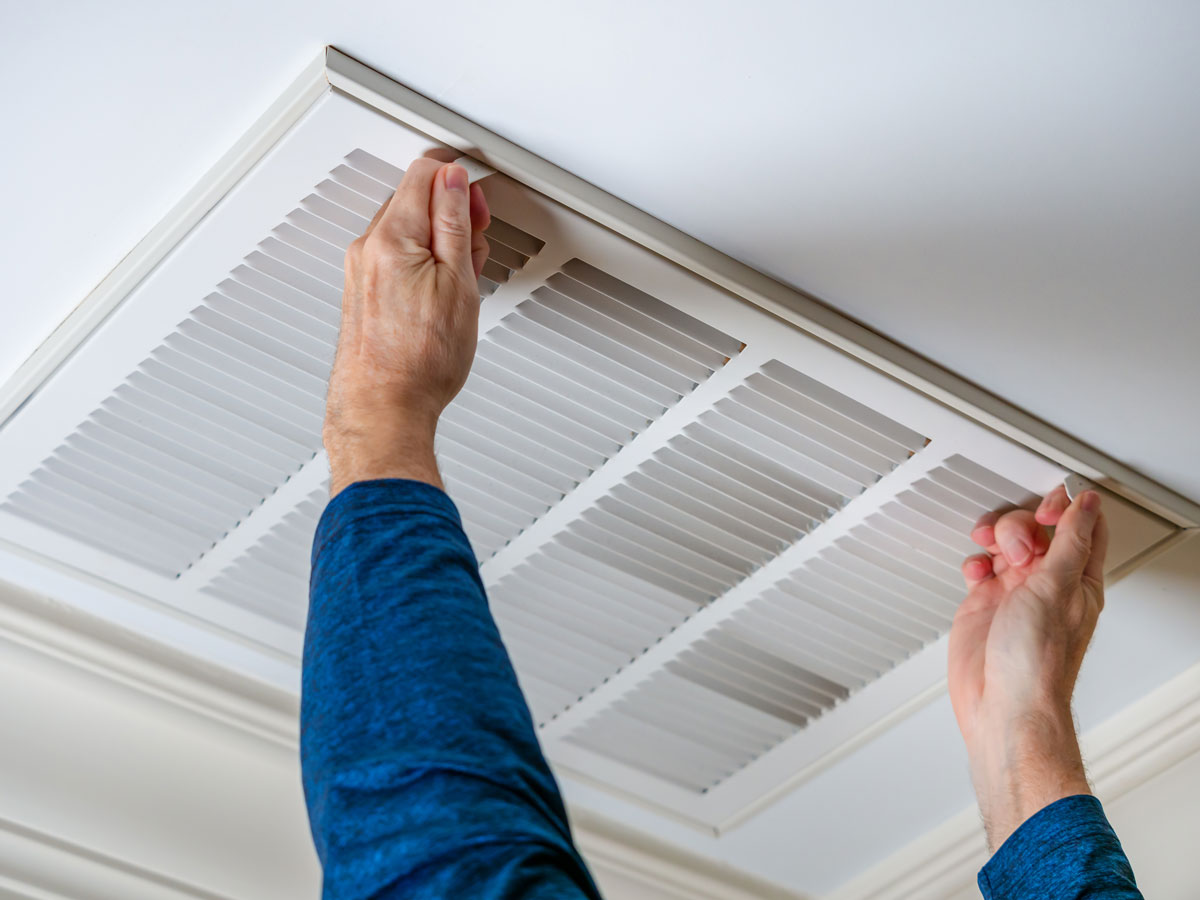
Replace Air Filters
Regularly replacing air filters in your heating system is crucial for maintaining ideal performance and efficiency. Filters trap dust, pollen, and other airborne particles, preventing them from circulating through your home. Over time, these filters can become clogged, reducing airflow and forcing your system to work harder. This not only increases your energy bills but also shortens the lifespan of your heating system.
To replace your air filter, first, turn off your heating system to guarantee safety. Locate the filter compartment, which is typically near the intake blower of your furnace or air handler. Remove the old filter by sliding it out carefully. Take note of the filter’s dimensions, usually printed on the side, to ensure you purchase the correct size replacement.
When installing a new filter, verify the arrows on the frame point in the direction of airflow, generally towards the blower. Slide the new filter into the compartment until it fits snugly.
It’s advisable to replace filters every 1-3 months, depending on your home’s air quality and usage frequency. Consistent filter replacement guarantees your heating system operates efficiently, providing a comfortable and cost-effective environment during winter months.
Clean Vents and Ducts
To maintain ideal airflow and efficiency in your heating system, confirm vents and ducts are thoroughly cleaned to prevent dust and debris buildup.
Turn off the system to guarantee safety. Remove vent covers using a screwdriver. Wash these covers with mild soap and water, then dry them completely to avoid rust.
Next, use a vacuum with a hose attachment to reach into the ducts. Make sure you remove as much dust and debris as possible. Consider renting a duct-cleaning vacuum or hiring a professional service for deeper cleaning. Check for any visible signs of mold or excessive dirt, which may require specialized treatment.
Inspect the ducts for loose joints or leaks. Seal gaps with metal tape or duct mastic to prevent air from escaping, improving system efficiency and maintaining consistent temperature control.
Additionally, confirm all vents are unobstructed by furniture or curtains to allow maximum airflow.
Regular cleaning and inspection can enhance air quality and prolong the lifespan of your heating system. Remember, maintaining clean vents and ducts enhances performance and contributes to a healthier home environment.
Check Thermostat Settings
Verify your thermostat is set to the correct mode and temperature for maximum heating efficiency. First, verify it’s in ‘heat’ mode, as some thermostats default to ‘cool’ or ‘off’ when not in use.
Program the thermostat to a temperature that maintains comfort but doesn’t overwork your system. Typically, a setting around 68°F (20°C) when you’re home and awake is recommended. Lower it by 7-10°F (around 4-6°C) to conserve energy when you’re asleep or away.
Check if your thermostat is programmable or smart; these models can be scheduled to adjust temperatures automatically. If programmable, set it to adjust temperatures based on your daily routine. Use the mobile app to monitor and control settings remotely for smart thermostats.
Verify the thermostat’s clock is set accurately, especially after power outages or Daylight Saving Time changes, as incorrect times can disrupt programmed schedules.
Keep the thermostat away from heat sources like lamps or direct sunlight, which can cause false readings. Regularly replace batteries in battery-operated models to guarantee uninterrupted operation.
Seal Air Leaks
Identifying and sealing air leaks in your home improves heating efficiency by preventing warm air from escaping and cold air from entering.
Begin by conducting a thorough inspection to locate leaks. Focus on common areas such as windows, doors, attic hatches, and electrical outlets. Use your hand to feel for drafts, or utilize a smoke pen to identify subtle leaks.
Once you’ve identified the leaks, take action with these steps:
- Seal Windows and Doors: Apply weatherstripping around doors and windows to close gaps. Use a door sweep at the bottom of exterior doors for larger gaps.
- Caulk Gaps: Use caulking to seal cracks and gaps around stationary components like window frames, baseboards, and exterior walls. Verify the caulk is appropriate for the specific material and indoor or outdoor application.
- Insulate Outlets: Install foam gaskets behind electrical outlets and switch plates on exterior walls. This will prevent drafts from entering through these small openings.
- Check Attic and Basement: Verify that attic hatches and basement entries are properly sealed. Use weatherstripping or heavy-duty insulative materials to close any gaps.
Schedule Professional Maintenance
Schedule a professional maintenance check before the winter season begins to ensure your heating system runs efficiently. This important step guarantees your system operates at peak performance and prolongs its lifespan.
A certified technician will inspect and clean components, such as burners, heat exchangers, and blower motors, ensuring they’re free of dust and debris that could hinder performance.
During the maintenance check, the technician will also check for any signs of wear or potential issues. They’ll examine belts, bearings, and electrical connections, tightening or replacing parts as needed. This proactive approach prevents unexpected breakdowns when you need your heating system most.
Another essential task is calibrating thermostats to confirm accurate temperature readings, promoting energy efficiency. The technician will also inspect ventilation systems for blockages, ensuring proper airflow and reducing potential hazards.
Remember to ask the technician to check the system’s safety controls. This includes verifying the proper operation of limit switches and safety valves, which are crucial in preventing overheating and guaranteeing safe operation.
Test Carbon Monoxide Detectors
Guarantee the safety of your home by regularly testing carbon monoxide detectors to confirm they’re functioning correctly.
Carbon monoxide (CO) is a colorless, odorless gas that can be lethal if undetected. Ascertain your detectors are operational before the heating season begins.
Follow these steps to test your devices effectively:
- Locate the Test Button: Find the test button on the detector, usually located on the front. Press it to initiate a diagnostic test.
- Listen for the Alarm: Upon pressing the button, the detector should emit a loud, piercing sound. This confirms the alarm’s functionality. Replace the batteries or the unit if the sound is weak or absent.
- Check Expiration Date: CO detectors have a lifespan, typically 5-7 years. Check the manufacturing date on the back of the device. Replace it if it’s past its expiration.
- Verify Power Source: Ascertain the detector is receiving power. For battery-operated units, replace batteries annually. Hardwired detectors should have a backup battery, which also needs periodic replacement.
Insulate Pipes and Ducts
After confirming your carbon monoxide detectors are functioning correctly, focus on insulating pipes and ducts to enhance your heating system’s efficiency and prevent energy loss.
Start by identifying exposed pipes and ducts, which are typically found in unconditioned spaces like basements, attics, and crawl spaces. For pipes, use pre-slit foam pipe insulation, selecting the appropriate diameter to guarantee a snug fit. Apply foil-faced fiberglass insulation or duct wrap for ducts, ensuring all seams are sealed with foil tape.
Install the insulation by cutting it to the required length and fitting it securely around the pipes or ducts. Overlap the edges of the insulation to eliminate gaps where heat could escape.
When working with fiberglass insulation, wear protective gear to avoid irritation. Pay special attention to bends, valves, and joints, as these are potential weak points for heat loss. Use additional tape or insulation at these junctions to ensure complete coverage.
Upgrade to a Programmable Thermostat
Upgrading to a programmable thermostat enhances your heating schedule by adjusting temperatures automatically based on your daily routines. This guarantees comfort and efficiency, reducing energy waste and lowering utility bills.
Here’s how you can make the most of this upgrade:
- Identify Your Schedule: Determine when you’re home, asleep, or away. Program the thermostat to lower the temperature when your house is empty or during nighttime. Aim for a 7-10 degree Fahrenheit reduction for 8 hours daily to cut heating costs by about 10% annually.
- Choose the Right Model: Evaluate features such as Wi-Fi connectivity, remote access, and multi-zone control. Models with smart technology can learn and adapt to your preferences, offering even greater efficiency.
- Installation: Follow the manufacturer’s instructions carefully, or hire a professional. Confirm the thermostat’s location is ideal—away from direct sunlight, drafts, or heat sources—for accurate readings.
- Regular Updates: Review and adjust the settings to reflect any changes in your schedule or seasonal temperature shifts. Most programmable thermostats allow for multiple daily settings, so take advantage of this flexibility to maximize efficiency.
Implementing these steps will help maintain a comfortable home environment while conserving energy.
Review Energy Efficiency Tips
Wondering how to enhance your home’s energy efficiency this winter? Start by sealing air leaks around windows and doors with weather stripping or caulking. This prevents cold drafts from infiltrating your living space.
Next, inspect your attic insulation. Verify it’s at least R-38 to minimize heat loss. If necessary, add more insulation to reach ideal levels.
Don’t overlook your heating system’s maintenance. Clean or replace air filters every month to improve airflow and efficiency. Additionally, have a professional inspect your furnace or boiler annually to verify that it is operating efficiently. Check for any leaks in ductwork and seal them with mastic or foil-backed tape.
Consider installing a programmable thermostat if you haven’t already done so. Set it to lower temperatures when you’re asleep or away, and program it to warm up before you return. This reduces energy consumption without sacrificing comfort.
Conclusion
Winterizing your heating system guarantees it’s ready to keep your home warm and efficient.
Have you checked everything from air filters to thermostat settings? Regular maintenance and sealing of air leaks prevent unnecessary energy loss.
Don’t forget to test carbon monoxide detectors and insulate pipes, which are essential for safety and efficiency.
Upgrading to a programmable thermostat can further optimize energy use.
Take these steps, and your home will be cozy throughout winter.